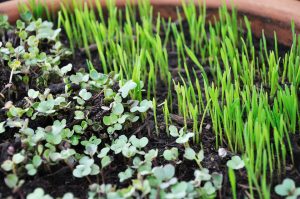
Microgreens are not just the latest culinary craze but can yield serious agricultural dividends in Zambia without spending alot of money or using much space. So what’s the catch? A short shelf life. That is, one week, maximum, even when refrigerated.
Microgreens also known as “vegetable confetti,” are the shoots of salad vegetables such as rocket, celery, beetroot, etc., picked just after the first leaves have developed. Chefs and home cooks look for those with a unique flavor, color or texture.
Often confused with sprouts, microgreens germinate in soil, not water and are harvested later. The little leaves contain up to 40 times more nutrients, including vitamins C, E, and K than their mature counterparts.
The planting process
Whether you’re growing indoors or out, plant the seeds in 1020 flats, elevated atop tables for ease in care and harvesting. Fill each flat with about an inch of organic potting soil, and sow the seeds across the top, aiming for a ratio of roughly 10 per square inch with smaller seeds and about half that with larger ones. Gently tamp down and water with a slow mist. Outside, position the tables in an area that receives at least 6 hours of sunlight daily. Inside, rely on warming mats and T5 fluorescent bulbs to provide the necessary heat and light. Cover each flat with plastic wrap to maintain humidity; remove at the first sign of germination. Because Zambian summers are very hot, avoid planting in a green house.
Caring and Harvesting
The nice thing about microgreens is that will never reach maturity, so thinning isn’t necessary. Mist them daily after removing the plastic, to keep the soil moist but not wet. Continuous airflow is also important to prevent mold. Position a box fan so it blows directly over the flats, indoors or out. Microgreens are ready to be harvested as soon as they’ve produced their first true leaves, generally when the plants have reached ½ to 2 inches tall, two to four weeks after sowing, depending on the plant type. Due to their fragile nature, the baby leaves require careful handling. Cut them at soil level with a pair of sharp kitchen scissors directly into their final packaging. Then start your next growing cycle with fresh soil and seeds.
Types of microgreens
Since any edible plant harvested early qualifies as a microgreen, the options are endless. However, below are some of the most popular fast and slow growers.
Fast-Growers (2 weeks)
Hong Vit radish
Red cabbage purple-veined leaves
Daikon radish white stem
Chinese cabbageKogane
Ruby Streaks mustard green and maroon leaves
Cressida cress three-lobed leaves
mustard green ruffled leaveGreen Wave
Dark Purple mizuna light-purple stems
Slow-Growers (4 weeks)
Bright Lights chard
Cilantro
Parsley
Purple Delight basil
Red Giant mustard
Lemon basil
Bull’s Blood beet
Celery
The ones easy to start from seed among the plants listed above are Hong Vit radish, Cressida cress, Bright Lights chard and Parsley.
Marketing
Because they’re highly perishable, you don’t want to harvest more microgreens than you can sell in a given week. Start small while you build a client base. Should your supply outstretch demand, let the plants grow another couple weeks, and try marketing them as baby greens. But who wouldn’t want a delicious plate of baby greens?

References:


I find this article on microgreens very handy. I look forward to more article of this type. I would like to see articles on pepper eg habanero, bird’s eye, cayenne, jalapeno, serrano and any one super hot chilli.
Pst Elias Musambazi Nyirenda
Thank you for stopping by. We’ll definitely look into that.